New site :)

Ladies and gentlemen I now have my OWN site!!  Bon Appetit Beantown has moved to http://www.bonappetitbeantown.com 🙂

I’ve been playing around with the backgrounds for a little while now…so many to choose from but very few that I actually liked.  Whelp folks, I think I’ve found a winner (as of now 😉 ) so head on over to http://www.bonappetitbeantown.com to check it out!  Remember to please update your Google readers as well.

See you on the new site :).

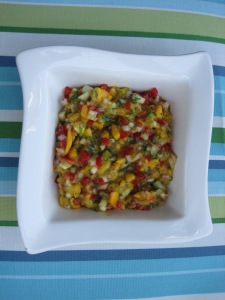
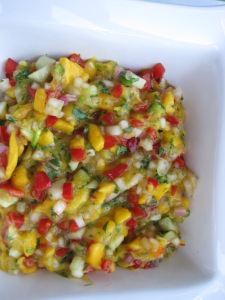
Mango Salsa

Wowza, what a busy week/weekend!  Sorry for the lack of posts last week – I was rockin’ at rolling both at work and at home busting out various projects…but now we’re back to your regularly scheduled program :).  Did everyone have a nice long weekend?  I had friends over on Friday to watch the Celtics (going to the finals woohoo!!) and had a wonderful time in both Connecticut and Maine (shout out to Helen at Home 🙂 ).  We really lucked out on the weather – but has anyone in the Boston (or north of) area noticed the smoky skies we’ve been having?  It’s actually from the wild fires burning in Quebec – scary!

On Friday night I made a few things for my friends and I to snack on while watching the C’s: Pesto Chicken Pizza, Mushroom & Pepperoni Pizza, Guacamole and Mango Salsa.  It was all quite good if I do say so myself ;), but I especially liked the Mango Salsa.  Champagne Mangos were on sale last week at good ol’ S&S so I decided to try them out.  They’re not as “mushy” as regular mangoes and paired together, provided a great consistency for the salsa.

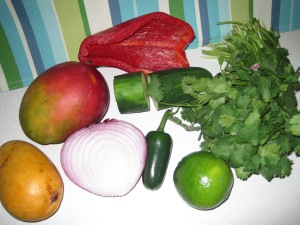
Ingredients:

  • 1/2 cup red onion, diced
  • 1/3 cup red pepper, diced
  • 1/3 cup peeled seeded cucumber, diced
  • 1 large mango
  • 1 Champagne mango
  • 1 tablespoon cilantro, minced
  • Zest & juice of 1 lime

Directions:

  1. Add onion, pepper, cucumber, cilantro and lime juice & zest together in a bowl.
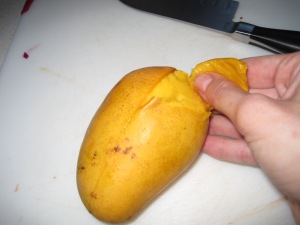
  2. Peel the mangoes and dice.  You’ll notice the Champagne mango will dice up into little squares, while depending on the ripeness of the regular mango, it will be a little more mushy/stringy.  * Note: Best way to peel a mango is make a length-wise cut around the fruit and peel back the skin. 
  3. Add mangoes to the bowl, stir and let sit for flavors to further combine

Bon appetit!

Have a nice “short” week 🙂 What did you do for the Memorial Day weekend?

(Award-winning) Ghirardelli Double Chocolate Chip Cookies

Source: amygrant.wordpress.com

What can you expect on a typical Friday at work?  Maybe a staff meeting?  Tying up loose ends from the week?  Start a new project???  Well last Friday, my company shook it all up and hosted its second annual COOKIE BAKE OFF!  A little jealous?  It’s ok 😉

The rules for the contest were simple, you must bring in at least a dozen cookies and you have to bake if you want to eat.  Umm…..how could I pass up a room full of cookies??  The choice was simple, even though my cookie baking skills leave something to be desired, I was entering this contest and I would enjoy each and every morsel of it :).

So on to the recipe…what should I make?  Lucky a family friend came to the rescue with a recipe for Ghirardelli Double Chocolate Chip Cookies – no further looking necessary, those would be perfect.

I’ll be honest, I 100% waited till the last minute to make these guys.  I woke up bright and early (6:15 a.m.) on Friday morning and broke out my bowls and spoons.  The whole process was super easy, but take note, the dough does need to chill for at least an hour before slicing & baking.  Unfortunately  my oven gets as hot as Hades and the cookies has a slight “smoky” flavor to them, but over all they turned out pretty good!  They even won “Most Chocolately Cookie” – not bad for my first try at the contest “circuit” ;).

Next time I make these I’ll be sure to shorten the cooking time – which I’ve reflected below.

Ghirardelli Double Chocolate Chip Cookies

Ingredients:

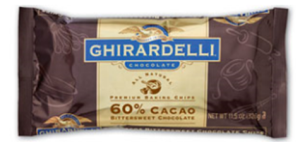
  • 1 bag Ghirardelli 60% Cacao Bittersweet Chocolate Chips
  • 6 tablespoons butter
  • 3 eggs
  • 1 cup sugar
  • 1/3 cup flour
  • 1/2 teaspoon baking powder
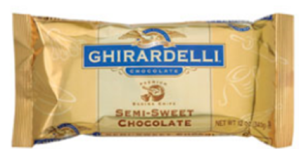
  • 1 bag Ghirardelli Semi-Sweet Chocolate Chips 
Directions:

  1. In a double boiler over hot water, melt the bittersweet chocolate chips and butter
  2. In a large bowl with electric mixer, beat eggs and sugar until thick, then stir in chocolate mixture.  I’m always worried I’ll scramble my eggs by adding hot items to them, so I added the chocolate a little at a time – who knows, this could be completely irrelevant, but I felt better doing it 🙂
  3. In small bowl, stir together flour and baking powder then add into the chocolate mixture
  4. Gently mix in semi-sweet chips 
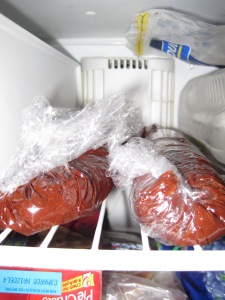
  5. Using a sheet of plastic wrap, form dough into 2 logs, each 2 inches in diameter and about 8 inches long
  6. As dough will be very soft, use plastic wrap to hold dough in log shapes; wrap tightly and refrigerate at least 1 hour or until firm (I actually stuck these babies in the freezer for about 40 min and they were fine) 
  7. Preheat oven to 375 degrees
  8. Unwrap dough and with a sharp knife, cut into 3/4 inch slices 
  9. Place slices 1 1/2 inches apart on greased or parchment-lined cookie sheet

10. Bake for 11 minutes or until shiny crust forms on top but interior is still soft 
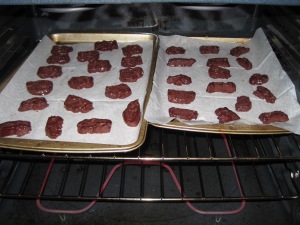
11. Cool on a baking sheet  (I may or may not have enjoyed a few prior to cooling 😉 )….. 

…….and enjoy!
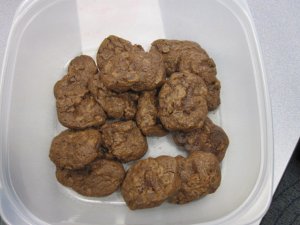
Bon appétit!

BIG thanks to Aliza for the recipe – I will definitely be making these again :).

Now, how about a look at a few of the other tasty entries…..

Almond Joy 'Joyal' Cookies
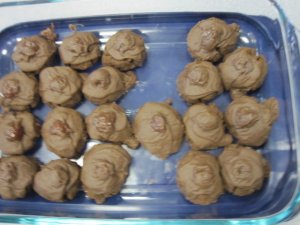
Chocolate Cherry Surprises

Chocolate Hazelnut Cookies with White Chocolate Chips

Coconut Cookies

Ramblings of a Readhead‘s Chocolate Cracker Cookies:
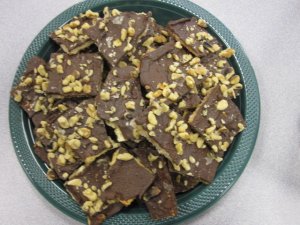
Chocolate Cracker Cookies

LalLizEats‘ Yellow Cake Mix Cookies with Chocolate Chips:

Yellow Cake Mix Cookies with Chocolate Chips

Heart-healthy Chcolate Chip Cookies

Potato Chip Cookies
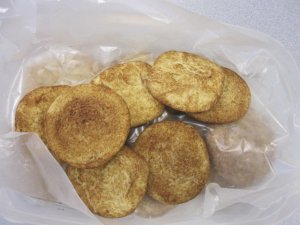
Snickerdoodles

PB Dots

Beardy Lollipop‘s original Raspberry Fig Newtons 🙂 :
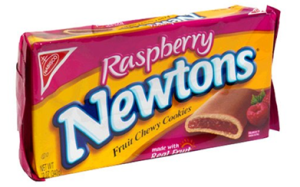
Raspberry Fig Newtons

and the ultimate WINNER……Cowboy Cookies!  These really were awesome!

Cowboy Cookies

* Pics courtesy of Kim Moniz

Cheers to all of the participants and the judges who tasted each and every cookie!  Can’t wait for next year’s bake off!

Source: wdexpo.org

– Christina

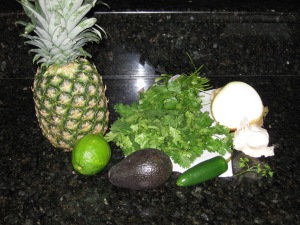
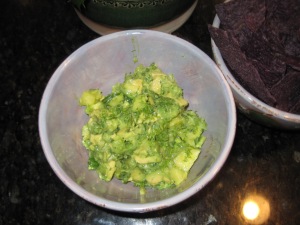
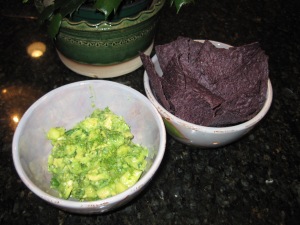
Pineapple Guacamole

It’s not lookin’ pretty outside my window this morning :(.  Rain, wind, clouds….but there’s light at the end of the tunnel folks!  Tomorrow is supposed to be sunny and warm.  Here’s a recipe for Pineapple Guacamole to get you in the summer spirit :).

Ingredients:

  • 1 clove garlic, minced
  • 1 tablespoon white onion, minced
  • 1 tablespoon cilantro, chopped
  • 1 teaspoon jalapeno, diced – more if you like it spicy!
  • 1 avocado, chopped
  • 1/2 cup pineapple, diced
  • Juice of a lime
  • S&P

Directions:

  1. Mix ingredients & mash slightly with fork
  2. Serve with tortilla chips (I love Tostitos Blue Corn chips – yum!)

Bon appetit!

In other news, I won a hair cut at Rock Paper Scissors (gratis 🙂 woohoo ) from the lovely ladies at We Are Not Martha.  I’m looking forward to scheduling an appointment soon at the recently opened Newbury Street salon.  Will be sure to share some before and after’s!

– Christina
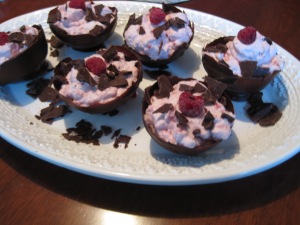
Chocolate Cups with Raspberry Mousse

My Mother is a very special woman.  She’s incredibly smart, loving and the best cook I know :).

Being as great as she is, I wanted to make a very special and unique dessert for Mother’s Day.  I saw Bakerella’s post on these cool looking chocolate pudding cups and knew I wanted to do something similar.  Bakerella used balloons as the form for her cups – what a neat idea!  Instead of pudding though, I decided to fill them with raspberry mousse :).

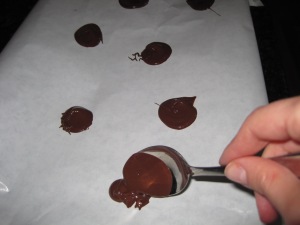
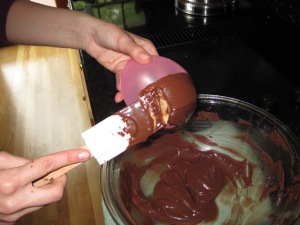
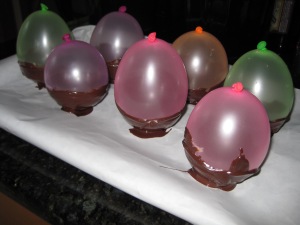
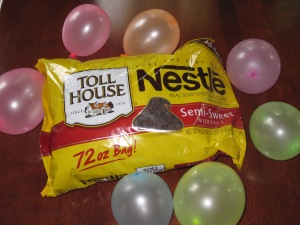
Equipped with neon water balloons, semisweet chocolates and the fixin’s for some pretty sweet mousse, I embarked on this concoction.  While the finished dish looked quite impressive and tasted delish, I would absolutely think twice about making these again!  The recipe says to dip the balloons in slightly cooled chocolate to form the cups…well, apparently I didn’t let it cool enough :/.  The first two balloons popped the second they touched the chocolate and the second three popped mid-cover.  There was chocolate everywhere!  I did however manage to make six successful cups.  If you do decide to make these, word to the wise, wear an apron ;).

Ingredients:

  • 1 1/4 cups semisweet chocolate chips
  • 6 water balloons, blown-up
  • Nonstick cooking spray
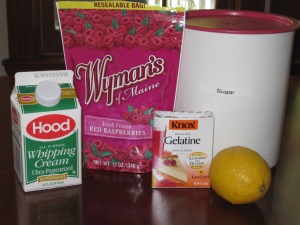
  • 2 cups frozen raspberries
  • 1/4 cup sugar
  • Squeeze lemon juice
  • 1 tablespoon unflavored gelatin
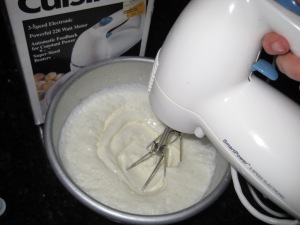
  • 4 cups whipped cream (I used heavy cream and whipped it myself) 

Directions:

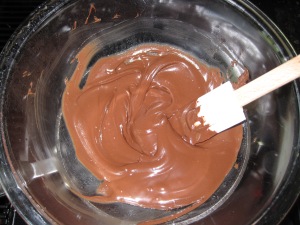
  1. In a double boiler (pyrex bowl over steaming pot ;)) melt the semisweet chocolate chips.  Let cool for at least 10 minutes (it may take longer though, but you’ve been warned!) 
  2. Line a baking sheet with wax paper and place six dollops of chocolate to serve as the standing point for the cups 
  3. Spray bottoms of water balloons with nonstick cooking spray and dip into chocolate covering the bottom 
  4. Place the balloons on the dollops of chocolate and put baking sheet in the fridge to cool for 30 min 
  5. In a saucepan combine the raspberries and sugar.  Heat and stir over medium heat until it turns to liquid (there will still be some pulp).  Squeeze a spritz of fresh lemon juice
  6. Stir in gelatin and remove from heat.  Scrape the mixture into a large bowl and let cool for 5-7 minutes.  (Don’t let it stand for longer than this, I made that mistake at first and ended up with raspberry jello…and had to start again)
  7. Mix 1 cup of the whipped cream into raspberry mixture until well combined, then fold in the remaining whipped cream
  8. Remove the chilled chocolate balloons from the fridge.  Using a pin pop the balloons and remove the “carnage” from the cups (you’ll know if you forgot to spray the bottoms with cooking spray at this point 😉 )
  9. Fills the cups with the mousse and put back in the fridge to chill for 10-15 min
  10. Decorate with raspberries and chocolate and serve right from the fridge

Bon appetit and good luck!

ALSO – I’m sure you’ve all been wondering about the cool giveaway I won last week 🙂  Well check it out over at Beardy Lollipop – I won a sweet new Beer Stein!  It’s certainly is one of a kind :).  Be sure to check out Mike’s Beardy Lollipop on the regular for unique facts, fun and some serious laughs!

-Christina

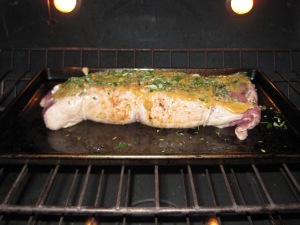
Rosemary Apricot Pork Tenderloin

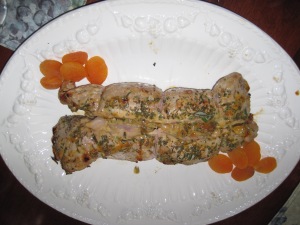
Wow – gorgeous weather out there today – sunny and 75 so this one’s gonna be a quickie 🙂  For the entrée of my Mother’s Day Menu I decided to make a Rosemary Apricot Pork Tenderloin.  I originally saw this in Self Magazine a year or so ago and its been on my ‘to-make’ list ever since :).

This was my first time making pork tenderloin so I was a little nervous, but it turned out great!  I have to say though this baby went back in the oven for another 15 min longer than the original recipe (I’ve reflected the change below) because it was a little pink for our liking.  Wasn’t trying to make Mom sick on her special day ;).  Point being, double-check your dish before diving in – just because a recipe says a specific time, doesn’t mean it’ll turn out the same for you.  Like finger prints, everyone’s oven is different :).

On to the ingredients…..

Ingredients:

  • Nonstick cooking spray
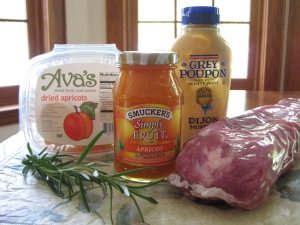
  • 2 tablespoons Dijon mustard
  • 2 tablespoons apricot fruit spread/jam
  • 2 lb pork tenderloin
  • 2/3 cup dried apricots
  • 2 tablespoons fresh rosemary

Directions:

  1. Preheat the oven to 450 degrees. Spray a baking sheet with nonstick cooking spray.
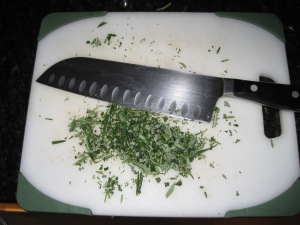
  2. Chop rosemary and apricots
  3. Combine mustard and apricot spread in a small bowl and microwave until soft (about 15 seconds)
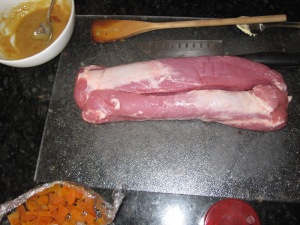
  4. Make a length-wise cut in the pork tenderloin, 3/4 of the way through.  Open the two flaps of the pork like a book.  If you cut all the way through by accident, do not fear, it will still work 🙂
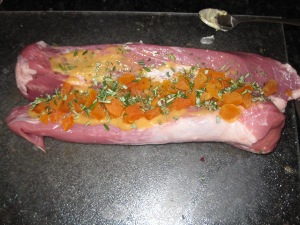
  5. Spread 1/2 of the mustard/apricot spread mixture over one side of the tenderloin.  Top with the chopped apricots and 1/2 of the chopped rosemary
  6. With cooking twine, tie the tenderloin closed every few inches (I made 3 ties)
  7. On a very hot skillet, sear the tenderloin to lock in the juices.  Rotate every 15 seconds to ensure each side is seared
  8. Place tenderloin seam-side (where the knots are) down on a baking sheet.  Cover the top with the remaining mustard/apricot spread mixture and sprinkle with the remaining chopped rosemary
  9. Bake in the center of the oven for 35-40 minutes
  10. Let the tenderloin rest for 15 min after taking out of the oven
  11. Just before serving, cut the string and cut into 1 inch diagonal slices
  12. Decorate with the serving plate with a fee whole apricots and sprigs of rosemary 🙂

Bon appetit!

One remaining segment to the Mother’s Day Menu – check back tomorrow for Chocolate Cups with Raspberry Mousse Filling.

Time to get outside and enjoy that sunshine!

-Christina
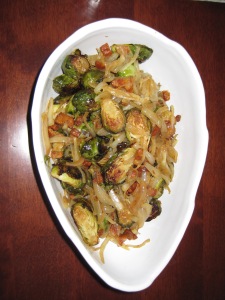
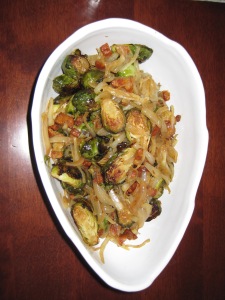
Mother’s Day Menu Side Dish: Brussels Sprouts, Pancetta and Caramelized Onions

Happy hump day friends!  Boston is gray and chilly this morning, but I think we’re in for a nice weekend.  In New England they say if you don’t like the weather, wait a minute and it will change.  How true!  Weather.com might say gusty winds and a few showers, and then we’ll end up having a heat wave.  On the flip side, you might expect sunshine all day and be met with a snowstorm while walking out the door (sans coat, I might add 😉 ).  I’ve always envisioned New England meteorologists getting together right before a segment and flipping a coin…heads huh?  I guess that means I’ll say rain for today. 🙂

Back to last weekend’s Mother’s Day Menu…..the side dish!  For this dish I decided to go with Brussels Sprouts, Pancetta and Caramelized Onions; a recipe I originally saw in Williams-Sonoma: Dinner Parties.  I’ve always loved Brussels sprouts…boiled, roasted or baked…and I knew I love ‘em even more with some bacon, or in this case pancetta, added – yum!  I used the exact ingredients from the original recipe; however my measurements are a little different, so keep that in mind if you have the book at home.

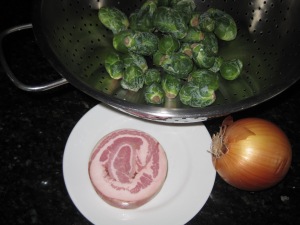
Ingredients:

  • 4 cups Brussels sprouts
  • 1 medium onion
  • ½ lb. cut of pancetta (you can have the butcher/deli master do this for you)
  • ½ tablespoon butter
  • 1 ½ tablespoons olive oil
  • 1 teaspoon balsamic vinegar

Directions:

  1. Preheat the oven to 450 degrees.
  2. Dice pancetta into ½ inch pieces and cook in a skillet over med-high heat, until crisp.  Remove with a slotted spoon and place on a paper towel to dry/cool.  Do not throw out the pancetta fat!
  3. Quarter onion and sliced into thin strips.  Add ½ tablespoon butter to pancetta fat then add the onions.  Turn heat to low and cook uncovered for onions to caramelize.  This should take about 15-20 min.  Once caramelized, remove from heat.
  4. Cut Brussels sprouts in half length-wise.  Place in a bowl to coat with 1 ½ tablespoons of olive oil and 1 teaspoon balsamic vinegar.  I recommend using good balsamic vinegar, as roasting concentrates the flavor.
  5. Spray nonstick cooking spray on a large baking sheet and lay Brussels sprouts out in a single layer.  Sprinkle S&P, but go lightly on the ‘S’; pancetta is very salty itself. 
  6. Roast in the oven for 20 min.
  7. Place the onions back on med heat and add the Brussels sprouts and pancetta.  Cook to heat through and combine flavors.  Serve warm.

Enjoy!

-Christina
Mother’s Day Menu :)

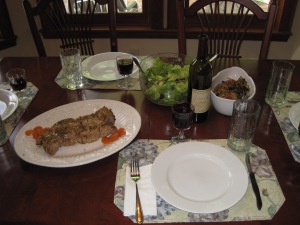
Hope you had a lovely Mother’s Day.  Yesterday I spent the day with the fam, cooking up a feast for Mom and  can honestly say I spent the entire day in the kitchen!  Of the menu listed below, I’d only made one of the dishes before and wanted to give myself enough time for mistakes, re-dos, etc (thanks to dessert, that time was necessary 😉 ).

It was a nice change cooking in my Mother’s kitchen – large counter tops provided ample room, random ingredients came to the rescue more than once and every cooking utensil known to man ensured I was properly armed to make each dish.

After dinner we all gave Mom her cards & gifts, including Julia Child’s Mastering the Art of French Cooking – a fine addition to her cook book collection.  P.S. Mom – I have my heart set on trying your rendition of Julia’s Beef Bourguignon, so let me know when I should come home to taste test!

On to the menu……

Menu:

  • Blueberry Pecan Salad
  • Brussels Sprouts, Pancetta and Caramelized Onions
  • Rosemary Apricot Pork Tenderloin
  • Chocolate Cups Filled with Raspberry Mousse

I’ll post a separate entry this week for each of the above, beginning today with the Blueberry Pecan Salad.

I first saw this salad on Food Network’s Simply Delicioso with Ingrid Hoffman.  The original recipe is Chicory Salad with Blueberries, Hazelnuts and Aged Manchego.  Honestly I’ve never made the salad as it was actually intended, but have kept the main ingredients while changing up a few things.  For the greens I’ve used spring mix, romaine and Boston/butter lettuce; hazelnuts have been substituded with toasted walnuts and pecans;  and the Manchego cheese has been replaced at times with parmigiano reggiano.  The dressing, a raspberry vinaigrette of sorts, along with the inclusion of blueberries never changes – to me, they’re key to the flavor of the dish.

For yesterday’s salad I chose to use Boston/butter lettuce, toasted pecans and parmigiano reggiano – but feel free to change it up as you wish.

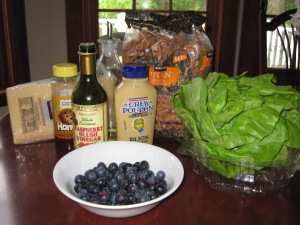
Ingredients:

  • 1 1/2 cups fresh blueberries
  • 3/4 cup pecans
  • 1 head Boston/butter lettuce
  • Parmigiano reggiano cheese
  • 1 tablespoon honey
  • 1 tablespoon Dijon mustard
  • 1 tablespoon raspberry vinegar
  • 2 tablespoons extra-virgin olive oil
  • S&P

Directions:

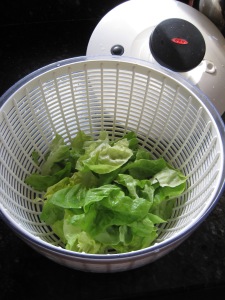
  1. Rinse the head of lettuce and dry.  You can do this by leaving the lettuce out on paper towels or using a salad spinner like mine from OXO.
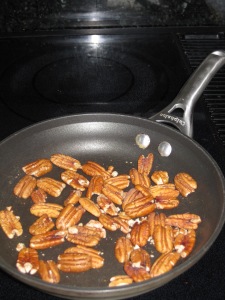
  2. In a dry pan, toast pecans over low-med heat for 5 min.  This helps further develop flavor, but keep on eye out because these guys can burn fast! 
  3. In a medium salad bowl, layer lettuce, pecans and blueberries.
  4. For the dressing; in a shallow bowl add honey, mustard, vinegar and S&P then stream in olive oil mixing to combine.  Pour dressing over salad & mix.
  5. Shave parmigiano over salad & serve.

Enjoy!

What did you do this weekend?

-Christina
Happy Mother’s Day!

Source: morguefile.com


Happy Mother’s Day everyone!  Hope you’re all enjoying this beautiful day.  

A special Happy Mother’s Day to my own Mom 🙂  I love you! 

-Christina
TGIF Watermelon Salad

Happy Friday!  What a gorgeous week its been – sunshine, warm temps, blue skies.  It’s supposed to cool down a bit in the Bean this weekend, but with 55 at the absolute low, I’ll take it :).

Last night I tried Allston’s newest Middle Eastern food hot spot, Garlic ‘N Lemons.  It’s officially described as ‘Mediterranean-inspired Lebanese food’ and being 1/2 Lebanese myself, I could not wait for this place to open.  The food is great, people are nice and with counter service only,everything comes out fast.  I’ll have to do a longer post soon with pics & recommendations.  In the meantime, check out the Harvard Ave. restaurant on Facebook and Twitter – they also have a Web site that’s currently under construction.

In other news…Sunday is Mother’s Day!  Have any plans?  I’ll be headed to my parents’ house to make Mom a special dinner (menu cannot be discussed at this time as Mom reads the blog :), but I’ll do a full recap for Monday).  If you’re in the Boston area and looking to eat out on Sunday,  check out Boston.com’s list of Mother’s Day Brunch options.

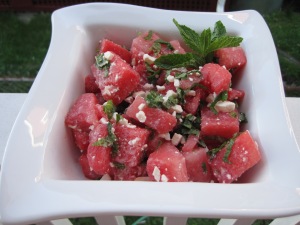
In warmer weather I usually crave lighter fare, which is exactly how I was feeling about my lunch for today – a Watermelon Salad with Mint & Feta.  I’d be surprised if you’ve never seen this dish somewhere in the summer, but it’s often made with tomatoes and red onion.  I love both of those veggies, but not with watermelon.  So I guess just choose for yourself – that’s what cooking & eating is all about :).

Putting the salad together is almost effortless and should be eaten the day of preparation.

Watermelon Salad

Ingredients:

  • 2 cups watermelon, cubed
  • 1 1/2 tablespoons mint, cut into ribbons
  • 1 1/2 tablespoons crumbled feta
  • Black pepper

Directions:

  • Mix together 🙂

Enjoy!

ALSO – Just won an AWESOME giveaway!  First blog giveaway win ever 🙂 and it totally made my day.  The official news hasn’t been released to the public quite yet, so I’ll have to update you all on my winnings next week.

Until then….have a GREAT weekend!

– Christina